In this tutorial, we will demonstrate how to set up MySQL Datasource on WebSphere Application Server.
1.Create the J2C Authentication alias with MySQL username and password
a.Go to admin console
 b. Expand security


c.Set Implementation class to com.mysql.jdbc.jdbc2.optional.MysqlConnectionPoolDataSource.

click next
d.Set Database classpath to the location of the MySQL JDBC connector .jar file.


1.Create the J2C Authentication alias with MySQL username and password
a.Go to admin console


c. select Global security
d. In the Authentication section, expand Java Authentication and Authorization Service and click J2C authentication data.

e. Click New to create a new JAAS authentication entry.
f. Enter a name in the Alias field that represents the alias name of the JAAS login configuration for the role-based authorization for J2EE resources
g. Enter an ID for the JAAS login configuration in the User ID field .
h. Enter a password for the JAAS login configuration in the Password field.
i. Enter a description for the JAAS login configuration in the Description field.
j . Click OK.
k. Click Save to save directly to the master configuration.
2. Set up the JDBC provider:
In the WebSphere Application Server console, click Resources > JDBC > JDBC Providers.
a.select scope cell level and click new

b. Set Database type to User defined

c.Set Implementation class to com.mysql.jdbc.jdbc2.optional.MysqlConnectionPoolDataSource.

click next
d.Set Database classpath to the location of the MySQL JDBC connector .jar file.

click next and click finish

e. Save your changes.
3. Create a data source for the IBM Worklight® database:
a. Click Resources > JDBC > Data sources.
b. Click New to create a data source.
c. Type any name (for example, orderstar (here orderstar is database name) ).
d. Set JNDI Name to jdbc/orderstar.

click next
e. Use the existing JDBC Provider MySQL, defined in the previous step.

click next
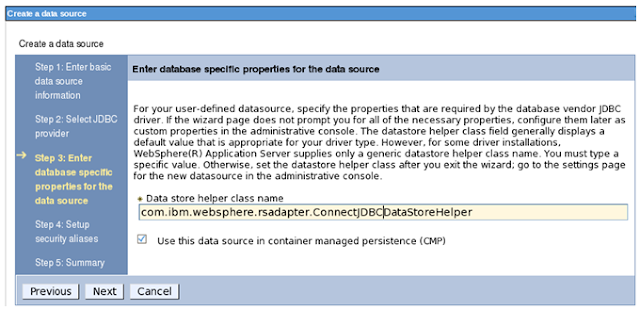
f. Enter data store helper class name is com.ibm.websphere.rsadapter.ConnectJDBCDataStoreHelper

click next an
g. setup security aliases so select exiting Global J2c authentication details

click next

Click Finish and Save the configuration.
4. finally change some Custom Properties
Go to Resources > JDBC >Data sources > orderstar > Custom properties
Search ServerName properties

select serverName and change value column to localhost

click ok and save
and search port

select port and change port value 3306

click ok and save
testing >>>go to Resources > JDBC > Data sources. select datasource and click Test Connection

Now its working........
No comments:
Post a Comment