This article explains how to set up ORACLE Datasource on WebSphere Application Server. It
covers only the database-specific configuration.
1. JDBC CONFIGURATION
a.From the admin
Solution Console, select Resources
--> JDBC --> JDBC Providers
b.Select a scope from
the drop-down list box
c. Click New
d. In the Create new
JDBC Provider screen,
> Database type:
select 'ORACLE'
> Implementation Type:
"Select Connection pool and data source"
> Name: Give any
name as per your requirement
> Click Next
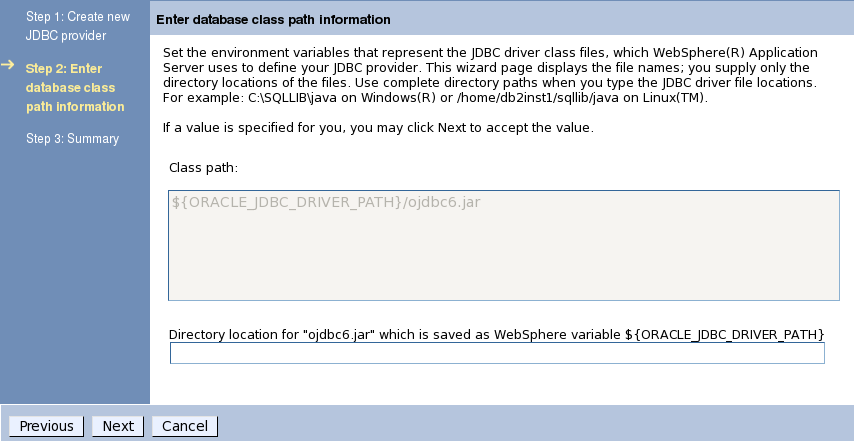
click next
Enter a absolute path of
ojdbc6.jar
Click Next
Click finish and save it
Now Jdbc configuration completed .
2. Creating a J2C authentication alias
a. Expand Security and
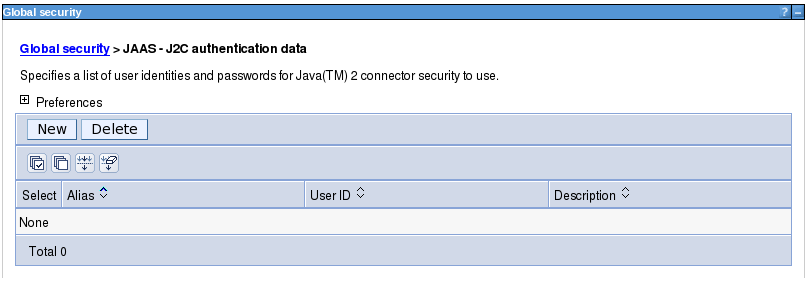
click the Global security link. The Global Security page opens.
b. Under the
Authentication section of the Global Security page, expand JAAS Configuration
and click the J2C authentication data link. The J2C Authentication Entries page
opens.
c. Click New. The New
dialog box opens.
Enter Above details as
per your requirements .
Alias: give any name
UserId: Database username
password: database
user password
D. click ok and save
it.
Now J2c configuration also completed
3. Create Datasource
a. Connect to the
WebSphere administration console
b. Select Resources->JDBC->Data sources
c. Select
a scope from the drop down list box.
.
d. Click the New
button
e. At the Enter basic
data source information screen enter a name and a JNDI name for the data
source. Click Next
f. click Next
g.
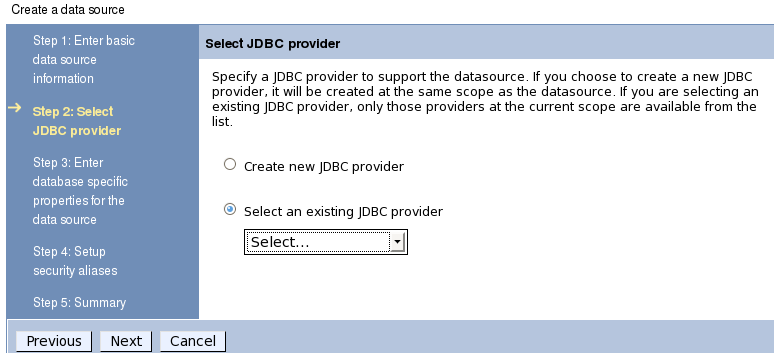
the next screen ask create jdbc provider
or select exiting jdbc provider . We already created jdbc provider so i select Select an exiting jdbc provider radio
button and drop down the exiting datasource.
click next
At the Enter database
specific properties for the data source screen use jdbc:oracle:thin:@websphe.tech.com:1521:orcl for the URL filed .
and Data Store helper
class name filed choose ORACLE 10G data
store Helper
click next
Select J2C authentication user info as next
screen
click next
click finish and save it.
Datasource configuration also completed.
4. Test the datasource
a. Goto Admin
console> resources>Jdbc>Datasource>
we Got error so as per
above error we can the ojdbc6.jar to ORACLE_JDBC_DRIVER_PATH.
Now i copied
ojdbc6.jar file so test again
Now
its successfully connected.
5. Change the connection pool properties .
a. Goto> Admin
Console>resources>jdbc>Data Sources> <dataSource Name>
select data source
Select Connection Pool
properties under Additional Properties at right hand side
Now
you can change properties according your requirements


No comments:
Post a Comment